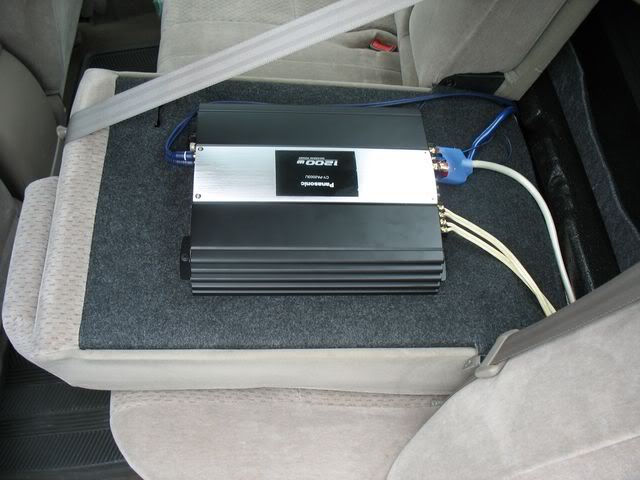
Car Amplifier Installation – Learn how
Why do I need a car amplifier
It is rather enjoyable to listen to music while driving your vehicle. But bad sounding tunes isn’t fun, instead of using your stock stereo and amplifier it’s better that you install a new amplifier to power up your speakers or subwoofer. Aftermarket speakers and factory speaker benefit greatly from additional power. The question is – Where do you start once you purchased your car amplifier?
Amplifier Installation Know How
First, you need to find a suitable location for your newly bought amplifier. We suggest you place the amplifier underneath the seat or in a cargo area. Dissapation of heat is improtant and should be considered when mounting an amplifier.
For the amplifier’s wiring, you should consider buying the proper gauge power cable, a shielded RCA signal cable, 3 feet of ground cable that has the same thickness as the power cable, a ‘remote on’ wire, and a 12-16 gauge speaker wire for the main speakers.
Next, you’ll need to get your tools ready for the job at hand. This would include things like:
- Wire cutters and crimpers
- Screwdrivers
- Wire Strippers
- A cutting tool
- Sandpaper
- Electrical Tape
Before you get started you will need to determine if you are going to use a line output converter or if you are making a direct connection to the aftermarket car stereo. Once you have determined where you are going to get your audio signal you may need instructions for taking of your vehicle’s dashboard apart. In actual fact, you should only remove the head unit of your vehicle’s dashboard as it is needed for hooking the the remote turn on and RCA cables.
With that out of the way, it is time for installing your amplifier. For your safety please ensure that nothing is connected to an electric current before you start.
Steps for installing the amplifier:
- You will start by disconnecting your vehicle’s negative cable from the battery.
- Then take the positive (red) power cable and attach it to the battery terminal on the positive side of your vehicle’s battery. Within 18 inches of the main battery connection you will install a fuse holder. The fuse is designed to protect the wire from melting and causing a fire if a short occurs.
- Now its simply a case of running the power cable through the vehicle’s firewall and to the amplifier. Care should be taken as to where run the wire. Do not run the power cables too close to speaker signal or wires.
- From here, you need make use of a metal screw or stud in order to connect the negative or ground cable. It’s important ensure the distance is not more than 3 feet as this could cause issues.
- Next, you will unscrew the bolt, clean the surface using sandpaper or a wire brush. Use a ring terminal to attach the ground wire, then fasten the screw or stud again. We recommend using a factory ground point and not a screw.
- Now you simply need to run the RCA cables down the opposite side of the vehicle to prevent noise. You’ll connect the RCA cables to a line output converter or to an aftermarket car stereo and to the amplifier.
- The next connection is the remote turn-on This connection is used to turn on the amplifier. This connection is easily made to an aftermarket stereo. If using a factory radio you will need to locate a circuit that has 12 volts when the key is in accessory position.
The wire is typically run with the power wire to the radio location. - From there you will need to run your speaker wires. We recommend that you crimp-on female spade connectors for every connection as this prevent stray strands of wire and shorts.
Before you close everything up
Before putting everything back together we recommend that you you go through your checklist to ensure that everything is in working order.
There you have it. Your amplifier is installed and ready to use.


Recent Comments